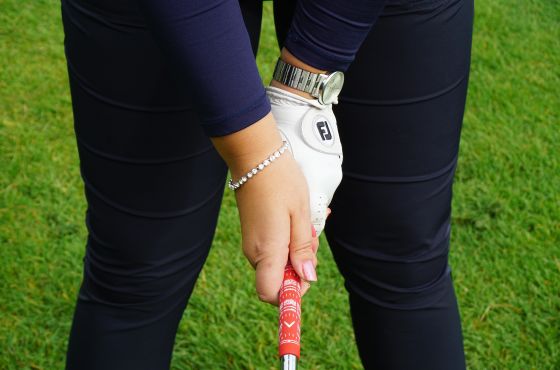
Pro tips for beginner golfers: Grip

Holding your club properly will ensure that you’re making every swing count when you’re out on the course. So let’s scrub up on an important fundamental: grip.
Here’s our PGA Professional, Joe’s, step by step guide to achieving a flawless grip. We’re taking you through an interlocking grip as this is Joe’s preferred golf grip.
Preparing for a perfect grip
It all starts with a perfect club face alignment. Before you take your grip, make sure that your club face is aligned square to the target. The leading edge of the club (front edge) should be exactly vertical. If you nail this, you’re guaranteed correct alignment when you lower the club down to the ground.
If you’re using a glove make sure that it fits snug and if you play left handed, just remember that your right hand is your top hand, rather than your left.
Positioning the top hand
1. Bring your left hand on to the side of the grip and position it so that the grip runs from the bass of your little finger across to the middle knuckle of your index finger. This will create a diagonal across your fingers. Let your fingers hook around the grip.
2. Next, bring your left hand around the top of the grip. It’s important that the heel of your hand sits on top of the grip (not on the side) as this gives you your leverage.
3. The back of your left wrist should now be at an angle so that if you were wearing a watch, it would be digging into the back of your hand. This is called a dish angle.
4. Lastly, make sure that your thumb is sitting at a slight diagonal with the base to the right of the centre of the grip and the pad on the front of the grip.
How to quick check your top hand position
• When looking down on top of your hand, you should be able to see two or three of your knuckles – any less and something’s not quite right.
• Joe also says that there should now be a crease between your thumb and forefinger which should be pointing up towards your right shoulder.
Positioning the bottom hand
1. Lay the grip across the middle of your fingers.
2. Close your right palm over the top of the grip and seal it over the top of your left thumb.
3. At the same time hook your right little finger into your left index finger, to lock them together.
4. Place your right thumb so that it sits just to the left side of the grip.
5. Again, you should have that dish angle in your right wrist.
Drop the pressure
There’s no need to hold on for dear life – trust us! The pressure on your grip should be a 6/10. Joe says imagine you’re holding a budgie – you don’t want it to fly away but you don’t want to crush it!
Common problems to watch out for
• Joe often sees beginners gripping their club with the palms of their hands and this affects leverage. Remember, you should always be gripping with your fingers.
• Don’t force the interlock! Keeping it relaxed is key with just a little hook at middle knuckles.
Joe’s quick fix grip tips
Here’s two handy ways to quickly correct your grip:
1. Take up your stance and let your arms hang naturally. With the club across your toe line, let it fall into your fingers and take your grip from there.
2. Or here’s our favourite – hold the club as if you’re swinging a sledgehammer. You’ll be surprised how well this works!
You’re practically a pro now! Keep your eye out for more pro golf tips coming soon. Raring to get out and put your new knowledge into practice or looking to improve your game? Give us a call on 0113 288 6000 to book on or find out about lessons.